How To Create a Stellar GitHub Profile That Gets You Hired As A Web Developer

If you are job-hunting as a developer, there’s a lot of competition, and you want to stand out as much as possible. Recently, I published an article on how to set up your LinkedIn profile to stand out and get hired, now let’s take a look at how we can improve your GitHub profile.
Your GitHub Profile
If you’re reading this, there’s a good chance you already have a GitHub account. (If not, create one now) Make sure all the important information is filled in on your profile.
When someone is looking at your profile, It’s important that they feel an immediate connection with you. Therefore, your profile needs to feel like you’re a person and not just another page.
Profile photo
Use a real photo of you, not GitHub defaults, not fake avatars, and not illustrations. Just like on LinkedIn, you need a professional-looking photo where people can see that they’re looking at a person that they can connect to.
Personal information
Fill in your personal information such as your name and location, decide whether you want to display your e-mail address publicly, fill in a personal URL and Twitter username if you have them.
For your personal URL, you could use a portfolio website or account on another platform. I opted to link to my Medium Profile here since I think my writing complements my professional profile.
Bio
Fill in a good bio that captures you and your function. Keep it simple and straightforward. This could be your current job title or something else that shows who you are. My bio is simple: “Senior Front-end Developer @ Nature.House”.
Of course, you could spice it up according to your personality. Here are GitHub’s thoughts on the bio field. “Thanks to @mentions and emoji, you can include information about where you currently or have previously worked, what type of work you do, or even what kind of coffee you drink.”
Your Projects
The project section is potentially the most important and also most difficult part of your GitHub profile. It’s perfect if the organization you work for has one or several public repositories that you already regularly contribute to.
If you’re like me, you work mostly on private repositories, leaving your GitHub profile pretty empty from the perspective of your day job. This however can be fixed easily by doing any of the following:
- List your portfolio website as one of the repositories
- Contribute to open-source projects
- Create small-sized projects such as a starter template for a new project
This way, you show several important aspects of being a professional developer:
- Your technical skills show in the code you commit
- Your work process shows in the commit history, code architecture, and releases/tags
- Non-work projects show your passion for development
- Depending on the projects, you can also show you’re good at collaborating with others through Pull request feedback and discussions.
Your Profile README
GitHub has a well-known feature where you include a README file within a project which is shown on the repository homepage. The READMe can contain anything about the project: how to install it, what it does, why decisions were made, what the mission behind the project is.
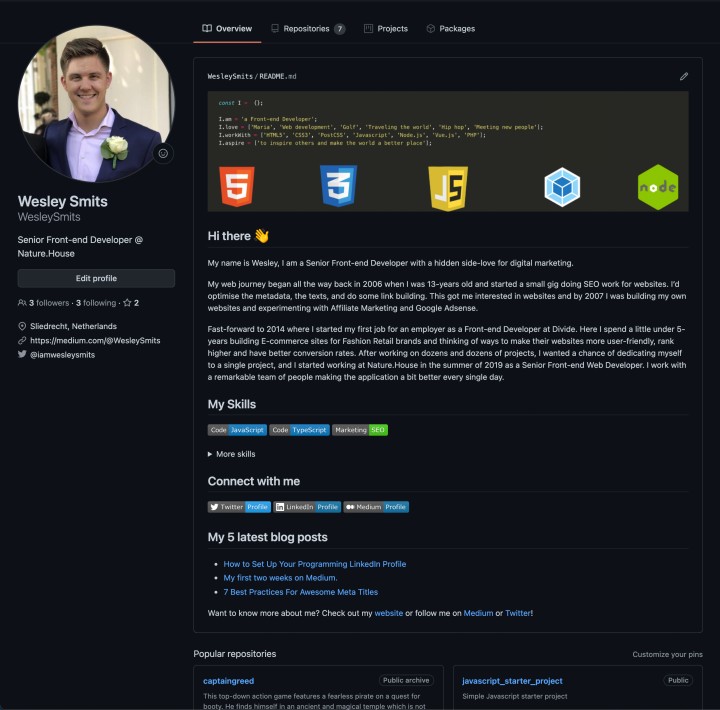
GitHub also offers you an option to create a profile README file, which you can use to customize your profile page with a lot more information.
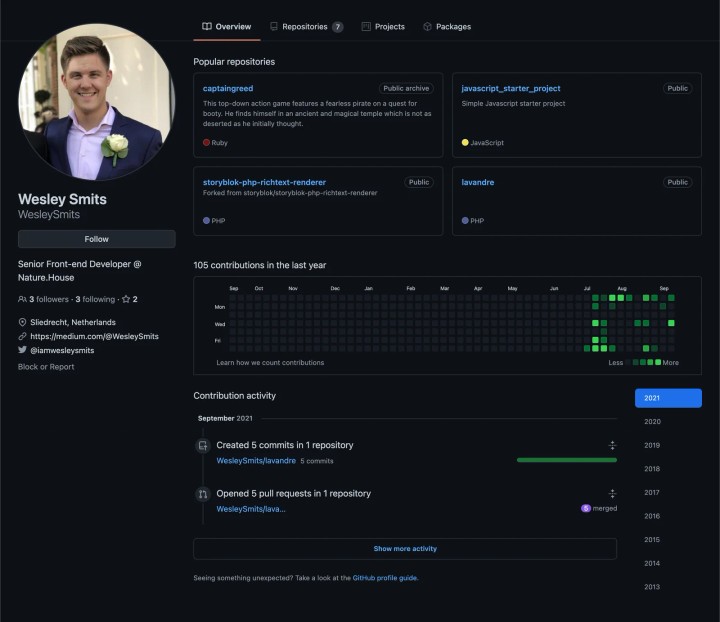
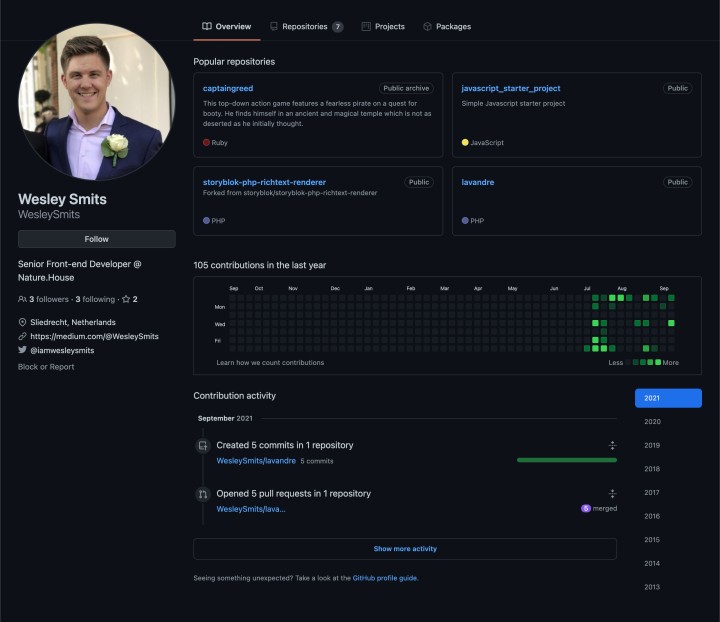
Here’s my profile with and without the profile README file.
How to Create a Profile Repository
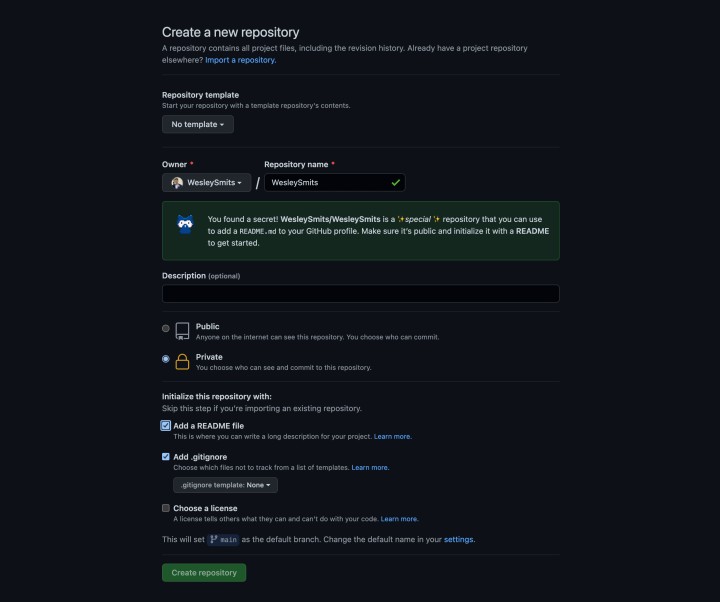
Log in to your GitHub account and create a new repository. Fill in your exact username as the repository name, and a message should pop up stating that you are creating a profile repository. See the screenshot above for an example.
In order for the README to show up on your profile, the repository needs to be public. For now, keep the repository private. We’ll set it to public once we’re done setting everything up.
Tick the box to include a README file and create the repository.
You can now clone the repository. Once you’ve cloned it you can edit the README file to your liking and push it back up into the repository. Once that’s done we’ll make the repository public, but first, we’ll go over the things you might want to add to your README.
Cover Image
Although not required, I suggest adding a cover image to the top of your README file. I reused my LinkedIn cover image with the following dimensions: 1584x396px.
The cover image could be something visually pleasing, entertaining, or distinctive about you. Just make sure to keep it professional.
About Text
Since GitHub by default only allows you to write 160 characters in your bio, this is the perfect place to tell people more about yourself and your journey. What do you do, why do you do it, and how did you get to where you are today?
Your Skills
Your profile README is an excellent location to highlight your skills which are not immediately clear from your GitHub profile. I decided to highlight my top three skills and hide the rest under a toggle using the HTML5 <details> tag.
Since the README file is parsed as Markdown, you can use HTML in the file without problems. This allowed me to use shields.io badges for my skills section, which looks better than a simple unordered list in my opinion.
Social Media Channels
I opted to include my Twitter, Medium, and LinkedIn profiles on my GitHub. LinkedIn seems like an obvious choice to network with like-minded people, and my Medium and Twitter links are a good place for people to follow my writing.
You could include other channels that suit you as well.
Automatically add your latest content through GitHub Actions
I decided to add the top 5 latest blog posts on my GitHub profile. Since I actively write on Medium I figured my articles would look good on my GitHub profile.
The interesting part here is that blog posts are automatically added to my GitHub profile. Perhaps you don’t write blog posts, but you do have portfolio items or something else that you could display here.
To automatically fetch the last few blog posts, I use GitHub actions to update the list of my latest blog posts every night at 00:00. This requires two things to be done:
- ### 1\. Including a start- and end comment in the README file, so the list can be placed in-between
- ### 2\. Adding an action to be performed automatically
In your profile repository create a folder called .github and inside that, another folder called workflows.
Here, we will create a file called blog-post-workflow.yml and paste in the following code.
name: Latest blog post workflow
on:
 schedule: # Run workflow automatically
   # This will make it run every hour
   – cron: '0 0 * * *'
  # Run workflow manually (without waiting for the cron to be called), through the Github Actions Workflow page directly
 workflow_dispatch:
jobs:
 update-readme-with-blog:
   name: Update this repo's README with latest blog posts
   runs-on: ubuntu-latest
   steps:
     – uses: actions/checkout@v2
     – uses: gautamkrishnar/blog-post-workflow@master
       with:
         # Replace this URL with your rss feed URL/s
         feed_list: "https://medium.com/feed/@WesleySmits"
Conclusion
GitHub is a powerful platform that complements your online identity as a developer. By creating a professional profile that showcases your skills, your interests, your past work, and your personality you are sure to stand out from the crowd and find the job you want!
Thanks for reading. If you have thoughts on this or think I left something out, be sure to leave a comment.
And if you want, you can connect with me on LinkedIn or Twitter!